Showing posts with label style. Show all posts

Wednesday, March 28, 2012

Style it Yourself Necklace

I'm calling this post a SIY or style it yourself, instead of a DIY....

One of the things that I love about crafting and blogging, is that it has awaken the creative spirit inside me. I get inspired to try different projects all the time. When I go thrifiting, I see pieces in a whole new light!

Recently, while out shopping, my Sissy (sister in law) tried on an adorable necklace that she found just a bit too short for her liking. A few days later, I was a Michaels, digging in the clearance, in search of the perfect piece to finish my Upcycled Cuff Bracelet, when I saw a piece that reminded me of the necklace that Sissy didn't buy.

So I decided to try something new! For the first time ever, I bought individual pieces and put together a necklace for one of my favorites!
Here are the charms that I bought. The one on the right is the piece that inspired this necklace.


And the vessel for the adorable charms. I bough this 36" strand of chain and used pliers to cut it in half, because Sissy loves a perfectly 18" necklace. The findings are very easy to use and come in a variety of metal colors to match your every style! I didn't use the butterfly for this necklace, but I'm sure it will live on somewhere...

Here' I am wearing Sissy's new necklace:

I am calling this Style It Yourself instead of "do" because I didn't make anything here, just used my creativity to put some already made pieces together.

Sissy loved her new necklace!!!!

What do you think?

Thursday, March 22, 2012

Nifty Thrifty! St. Patty's Day Edition!


Georgie and I love to throw parties! For me it's all about decorating, cooking and choosing the perfect outfit!

Each year we have an "I'm sick of winter" party, usually with a Hawaiian theme. This year, though, our party was delayed because we were busy with very important endeavors, you know, like going to Jamaica!

So we decided to have a St. Patty's Day party! I don't wear much green, so I set out to my favorite, Goodwill, to find an outfit.

I am serious when I tell you that I tried on every green shirt in the place! I ended up coming home with this sweater/tunic without trying it on just because it was only $1!!!

Now before, I show you the pic I should tell you that I forgot to take a pic until a few hours into the party and we were feelin silly and had given me a little shamrock forehead art.


Also, please excuse my necklace hanging off to the side, it has a mind of it's own.


Here's the outfit rundown
Tunic: thrifted
Gold heart choker: thrifted
Long gold chain: vintage
(meaning I stole it from mama's closed about 10 years ago)
Brown leggings: forever 21
Boots: Gojane.com

The necklace combo was inspired by one of my favorite style bloggers: J's everyday fashion. Check her out.
Here's the inspiring pin.

Pinned Image

Talk on her Pin was iffy on this long/short necklace combo but it inspired me and I like the way it turned out on my St. Patty's day outfit!

Where do you find your fashion inspiration?

Friday, December 9, 2011

Headband Curls!

As a girl with poker-straight hair, I'm always looking for new inventive ways to make it curly!

My mom and I have tried everything over the years. What we used most often was the rag method. My mom learned how to wrap hair in "rags" from her mother. You take a section of hair, wrap a strip of fabric around it (leaving a piece of rag at the top), and then wind the section around each other, and tie the end of the rag to the begining....the result is VERY curly and lasts all day, but its not very comfortable to sleep on and it looks really strange too. I remember going to the dress rehearsal for my senior year dance recital with my hair in rags, I wish we had a picture of that. :)

Now-a-days, I'm always searching for the easy way to curly hair. I had read about a method of wrapping hair around a headband that seemed quite promising, so I had to try!

It all started with wet hair and a head band...


And I wrapped it all up and secured the ends with clips


I went to bed hopeful and was happy to find my hair still wrapped when I awoke...


I wonder if George has been reading my blog? I guess he'll let me know, hey?

My hair felt like it was a bit damp in the morning still so I hit it with the blowdryer for a while.....
Then I unwound the headband.

Here's what I found..............


And.....not exactly what I was looking for...


Yup, scared of my own reflection...


I wonder what I could do differently???


Two things, I decided. First of all, dry hair! And second, 2 headbands!


So, if at first you don't suceed....


Take 2!


It's a wrap! Double time!
I basically did the same thing as before, but I clipped the top of my hair up and wrapped the bottom, then wrapped the top half in another headband, so each hair had more room to curl!


Morning! Wraps in tact!

I wonder what it looks like?


I took out the bottom wrap and.....


CURLS!!!!! So far so good!

One more headband to go.....
Lots of curls!!!! yay!!!!!!!!!!


Overall, the hair was quite curly, but the top section of my hair was only curled about halfway down.

Conclusion, PERFECT base of curls to style an updo in no time!

I was hoping for an easy-peasy way to have those perfect waves hanging loose all day......buuut.....not so much.

It was fun though, wasn't it :)


Monday, November 28, 2011

Jewelry Organizer

Here we are at another post inspired by Pinterest! If you're new to my blog, please check out Pinterest.com! You'll be glad that you did.

Here's the "Pin" That inspired me:


So I went to Lowe's to get my supplies! I then discovered that you can only buy full 4x8 sheets of peg board at Lowe's. My jewelry organizer was only going to be 2ft by 18 inches so that was too much for me. I ended up finding a 1/2 sheet at Menards for around $3.
At Lowe's though, I picked up some paint for the pegboard and a multi pack of pegs and hooks for about $10.


First, George cut my peg board and I painted it.


Then I had to choose a spot to hang it! I decided that bright pink pegboard didn't exactly match our cream, brown and blue bedroom, so I thought it best if I hid my organizer......


What does my closet have to do with this?


A hidden accessories paradise!!


For once my necklaces won't be tangled in a drawer!


I think my favorite part is the ribbon that I used to hang all my earrings! I didn't even know that I had so many!


This project was surprisingly easy and I am IN LOVE with the results. Usually when I'm getting ready, I don't add much extra jewelry because it always took so much time to search for what I needed and de-tangle it from the mess in my jewelry box. Not anymore! Now I can just push my clothes aside and see everything that I have right there!

I can't wait to have date night with fabulous accessories!

Have a great day!


Monday, November 21, 2011

T-Shirt Scarf!

Welcome to my very first "Upcycle" post!

This is an idea that I found, of course, on Pinterest! - See previous posts if you still don't know what Pinterest is!

This "Pin" lead me to this article on TidyMom.com!


She gives some amazing step by step instructions!!!
If I can do this, trust me, anyone can!


I used an old TShirt of George's (if you don't know who George is, ready the Nifty Thrifty post below!). - You should use a shirt that will fit a total of 8-12 paper plate circles on it - or 4-6 on each side.


< Traced my circles...


....then cut out my circles >


And spiral cut the circles -a lot of cutting in this project! After your cut the spirals, stretch them a bit to give them some extra bounce :)


Then I took some extra fabric and used my trusty hot glue gun to secure it together! TidyMom said that some T-Shirts will require two spirals to be glued together to ensure it's got the right length, but my spirals were extra long so I got to skip that step!


Here she is all done and curly!


I ended up cutting my sprials because they were a bit too long! When I put it on, I used a flower clip to hold it in place and finish the look. You could tie the two sides, or braid them, like I did when I wore it to work the next day.


Certainly not like any other scarf I've seen in the stores lately!

The best thing about my new scarf? It was FREE! And, recycled!

If you want to make one (and I encourage that you do) go to TidyMom.com and follow her instructions!

**I do realize that the picture quality leaves a lot to be desired here. Let's not make my little scarf feel bad about it though, it's not her fault! Leave her a comment and tell her how cute she is!**

Loves!

Friday, November 18, 2011

Nifty Thrifty!

Thrift Shopping is something that I LOVE to do!
I love clothes and changing my look often but I'm also really cheap!
I never pay full price for anything!

The best way thing about thrifting?
It's guilt free! I can come home with a bag full of clothes and George (that's what I call my husband) can't say anything because I usually spend less than $20!!! And it's recycling!

It's such a thrill to dig down in the racks and find something totally amazing!

I make sure to shop in all departments and all sizes! Something
that was a juniors dress could be a women's tunic! Also most clothes have been shrunken (makes me wanna say "it's already been sharunken" - in my best "Bring It On" voice) by their original owner so that L or XL on the label isn't always accurate!

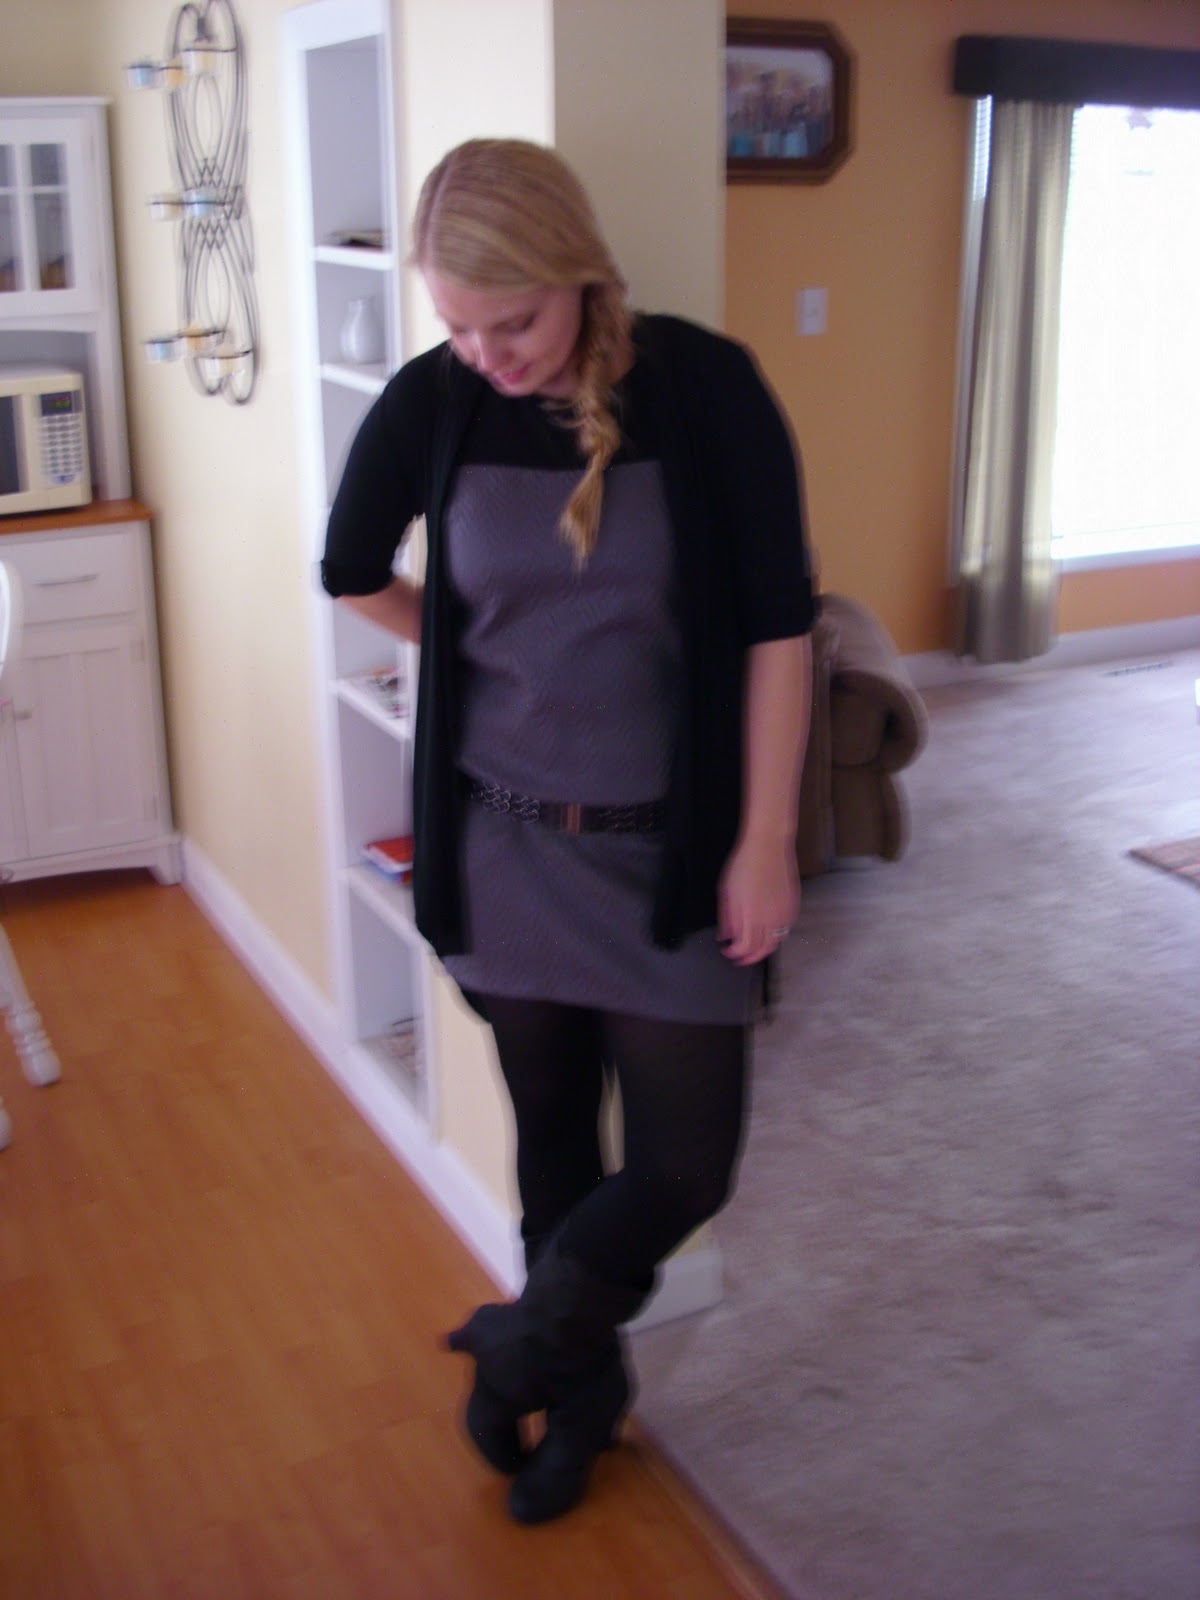
Recently I found this adorable jumper while at the Salvation Army.


It's gray with a herringbone pattern and a slight shimmer! A little short to wear on it's own but add some tights and we're good to go! I used a low slung belt to gather and pull the dress a little to make it fit more like a skirt/shirt combo. This dress has pockets but they are a bit low on my body so the belt covers them nicely. You could also sew the pockets shut and cut off the excess fabric if you wanted.

It goes perfect with my $24 boots from GoJane and my fave black cardi!

A great outfit for Christmas Eve or New Years Eve, maybe?

I am also starting to work on clothing "upcycling." which is where you take thrifted clothes and repurpose them into something new. Like a tank top into a purse or a woman's sweater into a child's dress. - There are so many ideas out there on the internet, many of them don't require any sewing! The possibilities are endless! Stay tuned for future upcyling posts!

Happy Thrifting!

:)

Thursday, November 3, 2011

DIY Jeweled Headband

I keep seeing jeweled headbands in the magazines and on TV. Last year I bought a black and silver one from Target and I wear it all it time.  I like them because you can jazz up your usual hairstyle without losing extra sleep on weekday mornings!

Having only one black headband, isn't really working for me though. I think I might need a few more :). Let's do a little shopping and find some inspiration...

This one from Nordstroms is adorable (gray is totally my color), it sells for $18.90


And I love the delicate flower on this one from the Gap, it's $9.95


Spending $10 to $20 on hair accessories, isn't really in my budget, though.  So yesterday I thought I'd venture out and make my own. You can get some headbands for around $3-$5 but I find those are mostly the thin metal type and they give me a headache. Plus, this way, mine are one of a kind!

Here's what I used:
The two headbands are from the Dollar Store ($1 each)
The flowers are from Michaels ($1.99 for both)
And the amber jewels are also from Michaels ($2.99 for a large package)
The hot glue gun, I already had.

It was very simple, the flowers were stick on but I added a drop of hot glue for good measure. Being that they are the centerpiece, I put those on first. Then I hot glued the jewels around the flowers and I'm done!

The end result:


Both were complete in about 10 minutes for around $7 (and I have a TON of jewels left over too).

Not bad, eh?


Happy Thursday :)