Happy New Year to all my friends and blog readers!
I love that during the last quarter of the year, we have so many reasons to look back and appreciate the last 12 months! I know I just did my "thanks" on Thanksgiving but there is something about New Year's that makes me want to look back and be grateful. If you've read my blog since Thanksgiving then you already know that I'm most thankful for my marriage and my family! They are the two most important things in my life!
Looking forward, I am thankful for the new life that I know will come in 2012 (not from me though, don't go getting any ideas!). I know some people who are expecting and I couldn't be happier for them and the new chapters in their lives! Having my niece come into the world has renewed my belief in love and life, if I didn't know it before, I really do believe babies are pure joy and love, and they force us to focus on what's truly important!
I'm not usually a "resolution" person, but since I have the blog, I'll take a moment to talk about somethings that I'd like to focus on next year and then we can all hold me accountable, okay? :)
I always want to remain grateful and joyful. I need to remember that I am the only one who has control over those two statements. It is always my responsibility to count my blessings and focus on the good! With that, a negative attitude is always my responsibility as well. No one forces us to go there, not customers, not bosses, not husbands or mothers or friends or strangers, we all willingly jump down the rabbit hole to negativity and it's always harder to climb back up. No matter what, I always have many things to be thankful for and will continue to remind myself everyday. And it's my responsibility to create more situations to grow, learn and enjoy!
Health, health health..... This is a difficult one! I would say I am a moderately healthy person. I don't have any major health issues, I quit smoking in 2010 (yay!), don't drink too much, etc. Now, I'm not knocking down the door to the gym or in shape by any means (let's just leave that can of worms closed), but I'm just sayin that I'm not on the waiting list for a hear attack either.... However, I would say there is one part of my life where I really need improvement.....
If you know me IRL (in real life), which I think you do (if you don't, comment on the blog so I know you are reading!) - then you'll know that my favorite thing to do is EAT!!! I don't always eat the most healthy food though , while I do enjoy salads and fruits and veggies; things like chips, turkey sandwiches, pickles, chili cheese fries, pasta - those are my faves (wow now I'm hungry!). I need to focus more on eating less processed foods, and not eating "out" so much. If I eat more whole foods and foods that I prepare myself, then I have more control over my health (and my weight) also, it will cost less $$! George and I are so busy that we pretty much take any excuse to pick up dinner vs. cooking! We are foodies for sure, but we need to kick the health up a notch! And spend less $$$!
Also WATER! you may also know that I am a Coca-cola addict (almost typed coke addict there but didn't want anyone to get the wrong idea, haha!). There is always more and more evidence that drinking water has immense health benefits. It's great for digestion, skin care, getting rid of waste and toxins - I could go on and on! I need to get into a better water routine! Maybe I only get a coke that day if I drank 1 or 2 bottles of water already?
It seems like I'll start a food or water routine but I can only keep up with it for about 30 days before I go back to my old ways. I know that looking at it as a "lifestyle" and change in moderation are keys here. I can't just say "I'm going to drink 64 ounces of water everyday and only eat out once a month and......" It's too extreme and it won't last. I need to make sustainable changes for a healthier lifestyle. Any one have tips or methods to help me out?
Well, this post kind of took on a life of it's own there, didn't it? :)
So, help keep me on track next year would ya? If you see me griping and crabbing about stuff (never happens, i know) then tell me to be grateful! If you see me eating chili cheese fries, back away slowly and don't touch them! But then email me a nice healthy recipe later.
What are your goals for next year?
Happy New Year!!!!!

Saturday, December 31, 2011
Wednesday, December 28, 2011
Tshirt Crafts!
I'm really startin to become obsessed with Tshirt crafts! I think it's really awesome to go to Goodwill, buy a 99 cent Tshirt and repurpose it into something cool and unique. It's fun, it's creative and it's recyling!!!!
I was researching some handmade Christmas gifts and I came across the idea for braided Tshirt bracelets..... I had to try.
Here's the how to post. - It's a bit of a winding road, but I did, in fact, find this through Pinterest (typical!).
This is one of those posts where the tutorial that I used is so awesome, that I didn't dare duplicate it! - It also means that I had to concentrate to follow it so I didn't take progress pictures! :-)
Here are my bracelets:


I thought the neckline was really cute and if I just cut it out right, it might make a cute little necklace. I ended up using the top half of the aplique and then used the back of the shirt as to tie the "necklace."
Also, I cut the rest of the bottom (up to the armpits) in about 1" strips (they were like big circles) and then stretched them out, and doubled them up for a little layered strand look. I used the rest of the flower aplique to add a little punch.
Here's what I ended up with at the end of the night....

I think the neckline piece, would look really cute over a turtle neck. I'll take a picture whenever I wear it!
Here's a close up of the strand necklace:


I was researching some handmade Christmas gifts and I came across the idea for braided Tshirt bracelets..... I had to try.
Here's the how to post. - It's a bit of a winding road, but I did, in fact, find this through Pinterest (typical!).
This is one of those posts where the tutorial that I used is so awesome, that I didn't dare duplicate it! - It also means that I had to concentrate to follow it so I didn't take progress pictures! :-)
Here are my bracelets:

After I was done with the bracelets, there was a lot of tshirt left, so I thought I'd just goof around and see what I can do with it. Here's what the rest of the tshirt looked like....

I thought the neckline was really cute and if I just cut it out right, it might make a cute little necklace. I ended up using the top half of the aplique and then used the back of the shirt as to tie the "necklace."
Also, I cut the rest of the bottom (up to the armpits) in about 1" strips (they were like big circles) and then stretched them out, and doubled them up for a little layered strand look. I used the rest of the flower aplique to add a little punch.
Here's what I ended up with at the end of the night....

I think the neckline piece, would look really cute over a turtle neck. I'll take a picture whenever I wear it!
Here's a close up of the strand necklace:

Can you see my polka dot slippers in the bottom corner :) Yes, this is how I spend my Friday nights!
Here's another pic of the 3 bracelets:

I made one for me, one for my sissy and the last for my friend Laura.
I even have enough purple tshirt left to make a couple of flower pins! Then I can actually blog those for you all!
Any tshirt crafts you'd like me to try?
Let me know!!
Saturday, December 24, 2011
Merry Christmas!
I hope this Christmas Eve finds all of you happy, healthy and with family and friends. :)
Tuesday, December 20, 2011
Wedding Picture Display!
I am always looking for unusual or different ways to display photos in our home. I love having the place filled with pictures that bring back moments in time that meant something to us. Of course being a newlywed, I have a TON of wedding pictures that I want to hang up.
I bet you can't guess where my photo wall inspiration came from.... :)


Here are my plaques hanging out while drying!
And of course, the finished project up on the wall:

It took a while to get the placement down but I love it! Big thanks to my friend Cryss (who is also the one who keeps my hair looking fab!) for his help with the arrangement, you're a genius! Right now the quote plaque says "my whole heart for my whole life," but I look forward to changing it often!
All photos are courtesy of our wedding photographers, Vienna Glenn Photography and Emily Dennis Photography! Amazing women!
I bet you can't guess where my photo wall inspiration came from.... :)

PINTEREST OF COURSE!!!!!
Follow me: Shawniepatrica
I thought this was a brilliant idea! And I figured I could do it pretty inexpensively (not that I'm cheap or anything, lol). I went to my favorite store, Michaels, to get started!
I decided that I wanted to do a few things....
1.) Since I'm obsessed with quotes, I decided to paint one wood plaque with chalkboard paint. That way I can change out which quote is on the wall over and over again! - I used the same chalkboard paint that was also on the wine glasses, however, I did mix a new batch because chalkboard paint doesn't really keep well.

This plaque was about $6
2.) The 2nd thing that I wanted to do was mix and match sizes of plaques and pictures. I looked through my wedding pics and decided on 10 shots that I wanted to include. I ended up doing 3 - 8x10 and 3 - 5x7 and 4- 4x6 pictures.


Here are my 4x6 plaques and my paints before I got started! I decided on 4 different colors: A terracotta pinkish color to go with the peach chalkboard, a taupe (because I love my neutrals), a brown to add depth and a nice metallic gold because that was our main wedding color. I picked up these small bottles of acrylic paint at Michaels for around $1 each and I have over half of each bottle left over.


Here are the 8x10s during the paint process. Michael's was actually out of these plaques for a few weeks so I ended up ordering them from Hobby Lobby.com. All of the picture plaques ranged from $1 to $3.
As you can see, I simply used a paper plate for the paints, it worked very well, the acrylic paint doesn't run at all! One tip I will provide is to go to Menards or Lowes and buy good paint brushes, I can be kind of lazy (shocker!), especially in the middle of a project and I'm also pretty cheap (i know, another shocker!), so I bought $1 brushes at Michaels and they were really difficult to use, the bristles kept getting stuck in the paint on the plaques..... You really do get what you pay for sometimes :).
After your plaques are painted and dry (I did two coats of paint!), you're ready to attach your pictures! This project was also my first time using Mod Podge! If you don't know what that is, it stands for Modern Decoupage. There are millions of recipes on line educating on how to make mod podge at home (elmer's glue and water, basically). I thought it best to use the real deal on this project, since it's our wedding photos and all! Mod Podge comes in many formulas, I used the gloss finish but there is also matte, glitter, etc.


First, I brushed (using a foam brush) the mod podge on the back of the photo and placed it on the plaque. Then I painted it all over on top. This gives the picture that glossy shine and also seals your edges to the plaque so that they don't lift. As you can see, mod podge goes on looking a bit like glue but have no fear, it dries perfectly clear and glossy! No brush marks either!

Here are my plaques hanging out while drying!
And of course, the finished project up on the wall:

It took a while to get the placement down but I love it! Big thanks to my friend Cryss (who is also the one who keeps my hair looking fab!) for his help with the arrangement, you're a genius! Right now the quote plaque says "my whole heart for my whole life," but I look forward to changing it often!
All photos are courtesy of our wedding photographers, Vienna Glenn Photography and Emily Dennis Photography! Amazing women!
Hope you enjoyed this craft!
Have a great day!
Thursday, December 15, 2011
Homemade Face Scrub!
Hello Everyone!
I thought I'd share with you a little homemade facial scrub that I use from time to time...
Olive Oil and Brown Sugar!

It really is that simple! I just put a bit of brown sugar in my palm and pour enough olive oil to make a paste.
Then rub it all over the face (you can feel it tighten), I leave it on for about 10-15 minutes (usually I fill the tub with bubbles, grab a book and lock the bathroom door!). When I'm ready to get out I use a warm wet washcloth in circular motions to remove! After I get out of the tub I moisturize!
The first time I tried it, I was amazed at how smooth my face felt!
Bonus: leave the bowl of brown sugar on the edge of the tub for a nice relaxing aroma during your bath!
Enjoy!
:)
Monday, December 12, 2011
Christmas Ornament
One more Christmas Craft for ya!
Here's her post.
Here are my supplies to start
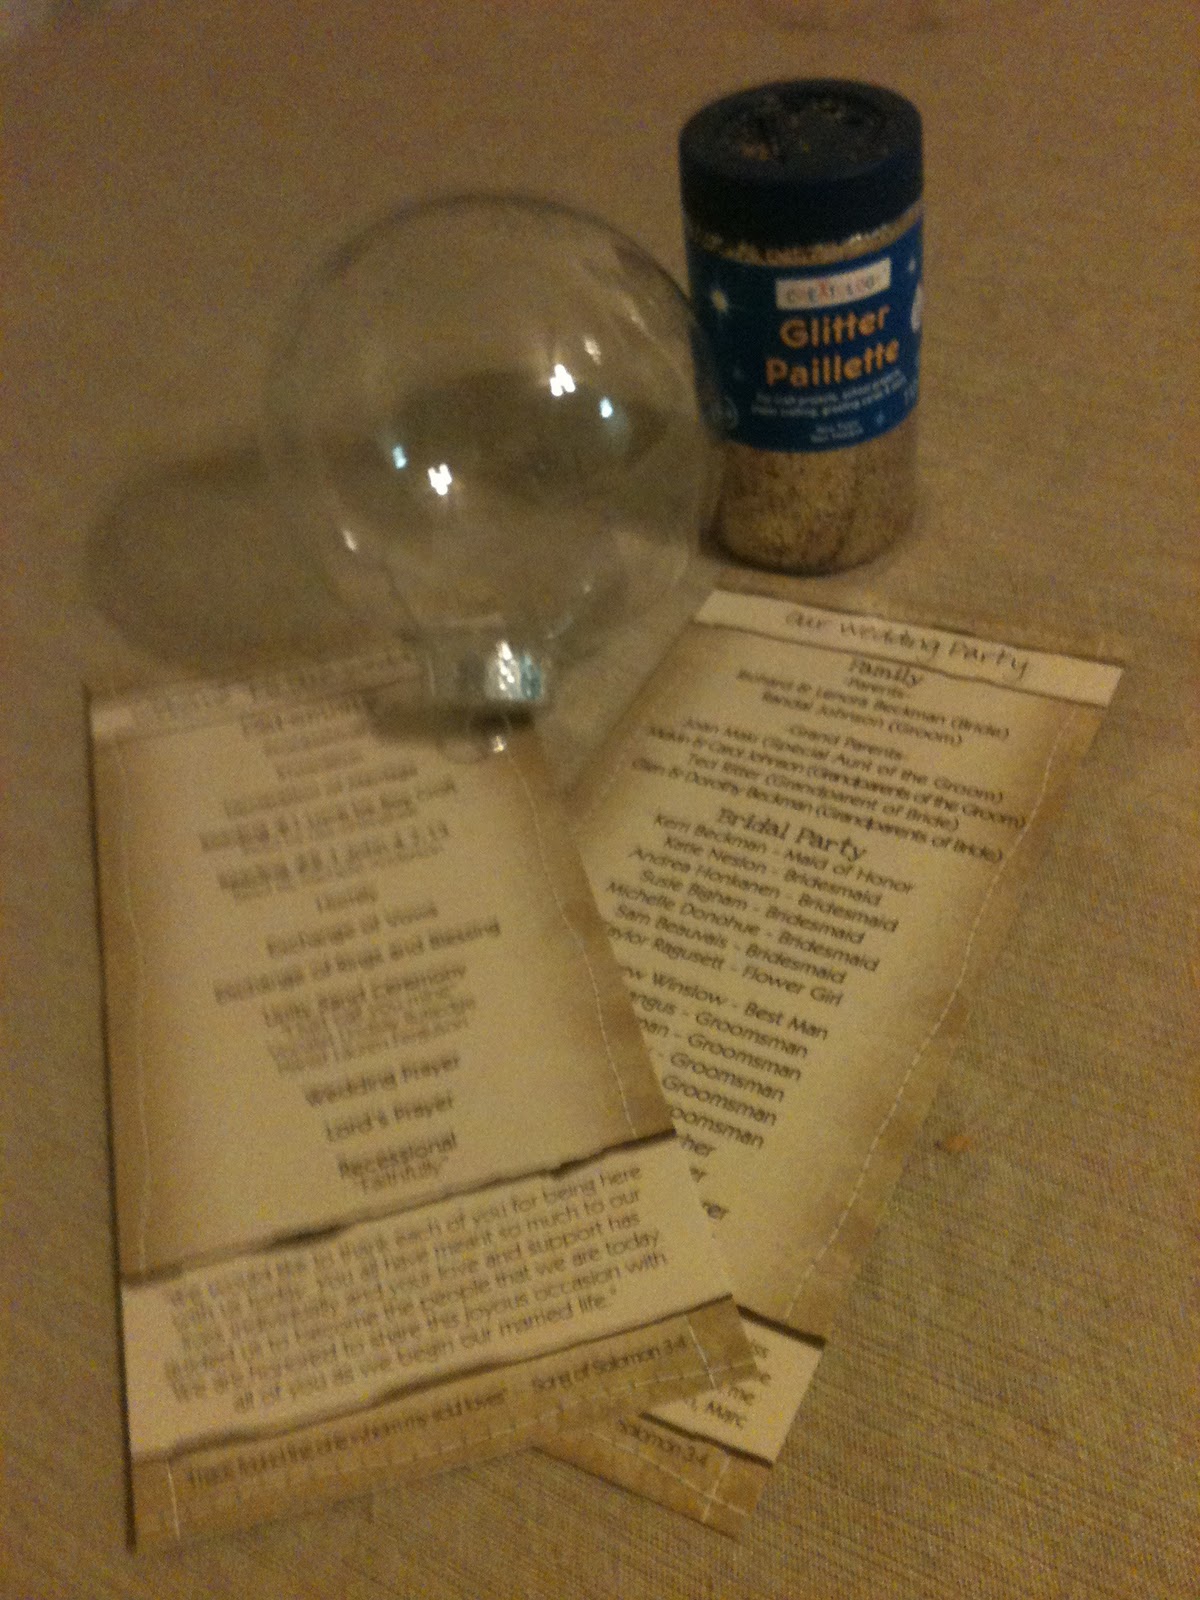
I grabbed two programs because I wasn't sure how many strips I would need, but one was enough. I cut the strips and wrapped them around a pen to curl. It was cool to cut and wrap so that important parts of the program are readable, like "The Lord's Prayer" and Marc's Mom's picture.

Then the fun part! I put the strips and a whole lotta glitter in the ball and shook the heck out of it!
The final product:

Cute and a great keepsake!!
Christmas is almost here!!!!!
Friday, December 9, 2011
Headband Curls!
As a girl with poker-straight hair, I'm always looking for new inventive ways to make it curly!
My mom and I have tried everything over the years. What we used most often was the rag method. My mom learned how to wrap hair in "rags" from her mother. You take a section of hair, wrap a strip of fabric around it (leaving a piece of rag at the top), and then wind the section around each other, and tie the end of the rag to the begining....the result is VERY curly and lasts all day, but its not very comfortable to sleep on and it looks really strange too. I remember going to the dress rehearsal for my senior year dance recital with my hair in rags, I wish we had a picture of that. :)
Now-a-days, I'm always searching for the easy way to curly hair. I had read about a method of wrapping hair around a headband that seemed quite promising, so I had to try!
It all started with wet hair and a head band...

And I wrapped it all up and secured the ends with clips

I went to bed hopeful and was happy to find my hair still wrapped when I awoke...


And.....not exactly what I was looking for...


Yup, scared of my own reflection...
I wonder what I could do differently???
Two things, I decided. First of all, dry hair! And second, 2 headbands!
So, if at first you don't suceed....

Take 2!

It's a wrap! Double time!
I basically did the same thing as before, but I clipped the top of my hair up and wrapped the bottom, then wrapped the top half in another headband, so each hair had more room to curl!


 Overall, the hair was quite curly, but the top section of my hair was only curled about halfway down.
Conclusion, PERFECT base of curls to style an updo in no time!
I was hoping for an easy-peasy way to have those perfect waves hanging loose all day......buuut.....not so much.
It was fun though, wasn't it :)
My mom and I have tried everything over the years. What we used most often was the rag method. My mom learned how to wrap hair in "rags" from her mother. You take a section of hair, wrap a strip of fabric around it (leaving a piece of rag at the top), and then wind the section around each other, and tie the end of the rag to the begining....the result is VERY curly and lasts all day, but its not very comfortable to sleep on and it looks really strange too. I remember going to the dress rehearsal for my senior year dance recital with my hair in rags, I wish we had a picture of that. :)
Now-a-days, I'm always searching for the easy way to curly hair. I had read about a method of wrapping hair around a headband that seemed quite promising, so I had to try!
It all started with wet hair and a head band...

And I wrapped it all up and secured the ends with clips

I went to bed hopeful and was happy to find my hair still wrapped when I awoke...


I wonder if George has been reading my blog? I guess he'll let me know, hey?
My hair felt like it was a bit damp in the morning still so I hit it with the blowdryer for a while.....
Then I unwound the headband.
Here's what I found..............

And.....not exactly what I was looking for...


Yup, scared of my own reflection...
I wonder what I could do differently???
Two things, I decided. First of all, dry hair! And second, 2 headbands!
So, if at first you don't suceed....

Take 2!

It's a wrap! Double time!
I basically did the same thing as before, but I clipped the top of my hair up and wrapped the bottom, then wrapped the top half in another headband, so each hair had more room to curl!


Morning! Wraps in tact!

I wonder what it looks like?
I took out the bottom wrap and.....

CURLS!!!!! So far so good!
One more headband to go.....

Lots of curls!!!! yay!!!!!!!!!!

Conclusion, PERFECT base of curls to style an updo in no time!
I was hoping for an easy-peasy way to have those perfect waves hanging loose all day......buuut.....not so much.
It was fun though, wasn't it :)
Monday, December 5, 2011
Makeover!!!!
Do you like my new look?
My fabulous friend, Andrea, generously took her time and talent to update my blog header!
I think it's fabulous, just like her!
Do you all like it?
Happy Monday!
My fabulous friend, Andrea, generously took her time and talent to update my blog header!
I think it's fabulous, just like her!
Do you all like it?
Happy Monday!
Friday, December 2, 2011
Where do you hang your Christmas Cards?
Aren't you always looking for a place to display all those Christmas cards you're getting? There really isn't much room for them around the house and it doesn't seem right to just throw them away?
Cue Pinterest with another awesome idea!!!

Of course I can't find the real original picture that I hand, this one, is close though! I thought this idea was genius, but after looking around Pinterest it seems I'm a little late to the party, there are tons of great "Christmas Card Hangers" out there!
Nonetheless, I chose to make something like this.
Here are my supplies all ready to go!
I used a piece of card stock as my base and scrapbook paper for my background


I hung two strands of gold ribbon (left over from the wedding!) from the card, and some yarn (left over from the wreath!) along the top!


Use clothes pins to hang all your Christmas cards!
Another easy, useful, fun project!
Happy Holidays!
Any ideas for another Christmas Craft?
Cue Pinterest with another awesome idea!!!

Of course I can't find the real original picture that I hand, this one, is close though! I thought this idea was genius, but after looking around Pinterest it seems I'm a little late to the party, there are tons of great "Christmas Card Hangers" out there!
Nonetheless, I chose to make something like this.
Here are my supplies all ready to go!
I used a piece of card stock as my base and scrapbook paper for my background

And some stickers to decorate with.

I hung two strands of gold ribbon (left over from the wedding!) from the card, and some yarn (left over from the wreath!) along the top!


Use clothes pins to hang all your Christmas cards!
Another easy, useful, fun project!
Happy Holidays!
Any ideas for another Christmas Craft?
Wednesday, November 30, 2011
Yarn Wreath
I was super excited to make a Christmas wreath for one of my "Christmas Craft" blog posts! There are so many awesome types of homemade wreaths on the internet it was hard to choose. Check out Pinterest (shocker!) to find one for yourself.
I chose a yarn wreath for my first time!
A good tip (that I didn't follow) is to purchase plumbing foam and tape it together to make the base of your wreath. Apparently it's only about $1. I can be kinda lazy though (shocker! again!) and the $5.99 floral foam wreath at Michael's was alot easier to bring home! Bad Shawn! Baaaad Shawn!


The next day, I made some flowers out of old Tshirts (which is a different blog post all together) and they turned out really cute. I just happened to have old Tshirts in matching colors!


I chose a yarn wreath for my first time!
A good tip (that I didn't follow) is to purchase plumbing foam and tape it together to make the base of your wreath. Apparently it's only about $1. I can be kinda lazy though (shocker! again!) and the $5.99 floral foam wreath at Michael's was alot easier to bring home! Bad Shawn! Baaaad Shawn!

Here is my base and my yarn ready to go.
Threading the yarn around the wreath was a bit time consuming but overall not hard one bit!

Whenever I began or ended a yarn color, I used a dab of hot glue and a little knot, both placed on the back side of the wreath. I chose to do 6 blocks of 3 colors.

The next day, I made some flowers out of old Tshirts (which is a different blog post all together) and they turned out really cute. I just happened to have old Tshirts in matching colors!

I think it turned out really cute! A very easy, inexpensive (and even cheaper if you're not lazy, like me) Christmas decoration! And throw in a little recycling for good measure :)
Here is a close up of the flowers.

Cute, eh?
Stay tuned to the blog for more Christmas Crafts!
:)
Monday, November 28, 2011
Jewelry Organizer
Here we are at another post inspired by Pinterest! If you're new to my blog, please check out Pinterest.com! You'll be glad that you did.
Here's the "Pin" That inspired me:

So I went to Lowe's to get my supplies! I then discovered that you can only buy full 4x8 sheets of peg board at Lowe's. My jewelry organizer was only going to be 2ft by 18 inches so that was too much for me. I ended up finding a 1/2 sheet at Menards for around $3.
At Lowe's though, I picked up some paint for the pegboard and a multi pack of pegs and hooks for about $10.
First, George cut my peg board and I painted it.


Then I had to choose a spot to hang it! I decided that bright pink pegboard didn't exactly match our cream, brown and blue bedroom, so I thought it best if I hid my organizer......

What does my closet have to do with this?

A hidden accessories paradise!!

For once my necklaces won't be tangled in a drawer!

I think my favorite part is the ribbon that I used to hang all my earrings! I didn't even know that I had so many!
This project was surprisingly easy and I am IN LOVE with the results. Usually when I'm getting ready, I don't add much extra jewelry because it always took so much time to search for what I needed and de-tangle it from the mess in my jewelry box. Not anymore! Now I can just push my clothes aside and see everything that I have right there!
I can't wait to have date night with fabulous accessories!
Have a great day!
Subscribe to:
Posts (Atom)